How to Create and Manage Parties
Create a party with an alias, addresses and a contact, find it by alias, then update its contact email and check revision dates.
- ForCompany Owners, Admins and team members authorized to manage Masters
- Task timeAbout 3 min
- Video2:33
- Last checked2026-10-23
Overview
Use Party Master to create a trading partner and maintain its saved details. Save each alias, address and contact entry before saving the party, then search by alias, edit a contact email and check revision dates.
What you'll learn
- Create a party using Party Name and optional business roles
- Add an alias, multiple addresses and a contact
- Save individual entries and the complete party record
- Search by alias and open View Party
- Update a contact email and check revision dates
Before you begin
- An existing Company you have created or joined
- Company Owner/Admin authority, or permission to view and manage Masters; view-only access does not allow creation or editing
Step-by-step guide
Open Party Master and name the party
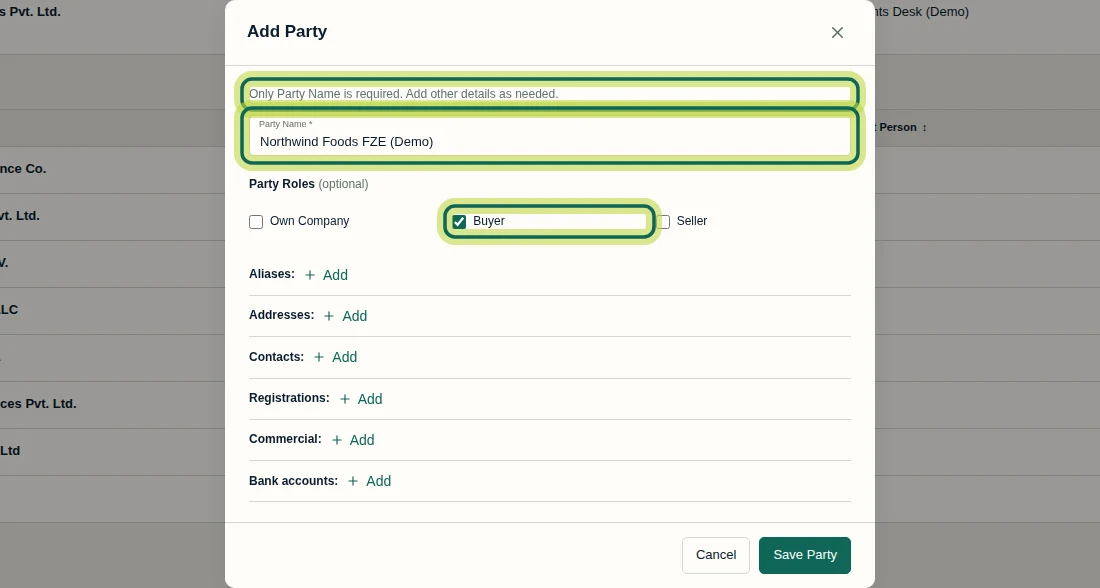
Open Party Master and select Add Party. Enter Party Name, the only required field. Under Party Roles (optional), select Buyer, Seller, or Own Company as appropriate; this example uses Buyer for Northwind Foods FZE (Demo). Buyer and Seller describe the party's business role and do not grant user access. You need Company Owner/Admin authority or permission to view and manage Masters to create or edit parties. View-only access lets you read records without creation or editing controls.
Step 1 Add and save an alias
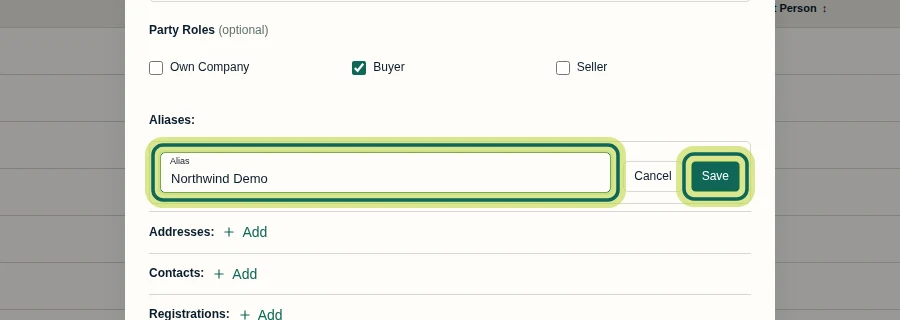
In Aliases, select Add, enter an Alias, and select the entry's Save button. This example uses Northwind Demo. An alias provides another value you can search for; it does not merge duplicate party records. Saving an entry adds it to the form. You must also select Save Party after finishing the party's details.
Step 2 Add one or more addresses
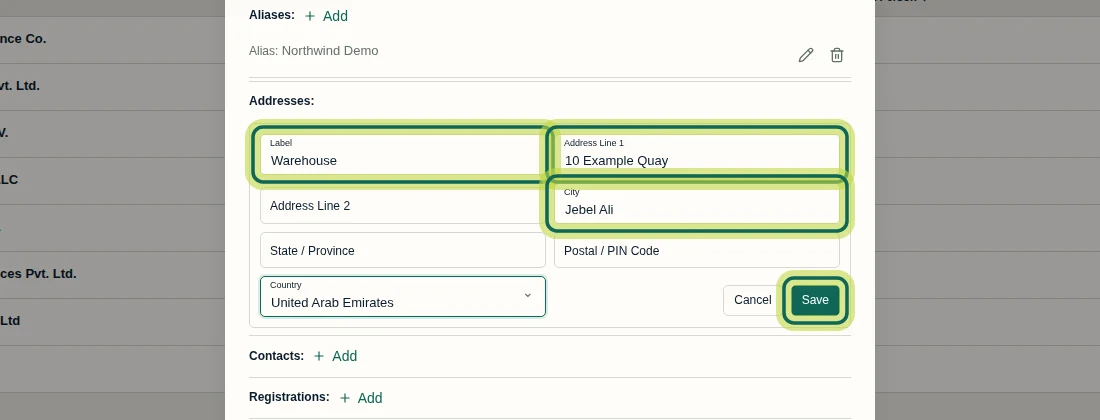
In Addresses, select Add. Fill in the details you have using Label, Address Line 1, Address Line 2, City, State / Province, Postal / PIN Code, and Country. You may leave unused fields blank. This example uses Warehouse, 10 Example Quay, Jebel Ali, and United Arab Emirates. Select the entry's Save button. To add another address, select Add in Addresses again, complete the second entry, and save it.
Step 3 Add a contact, then save the party
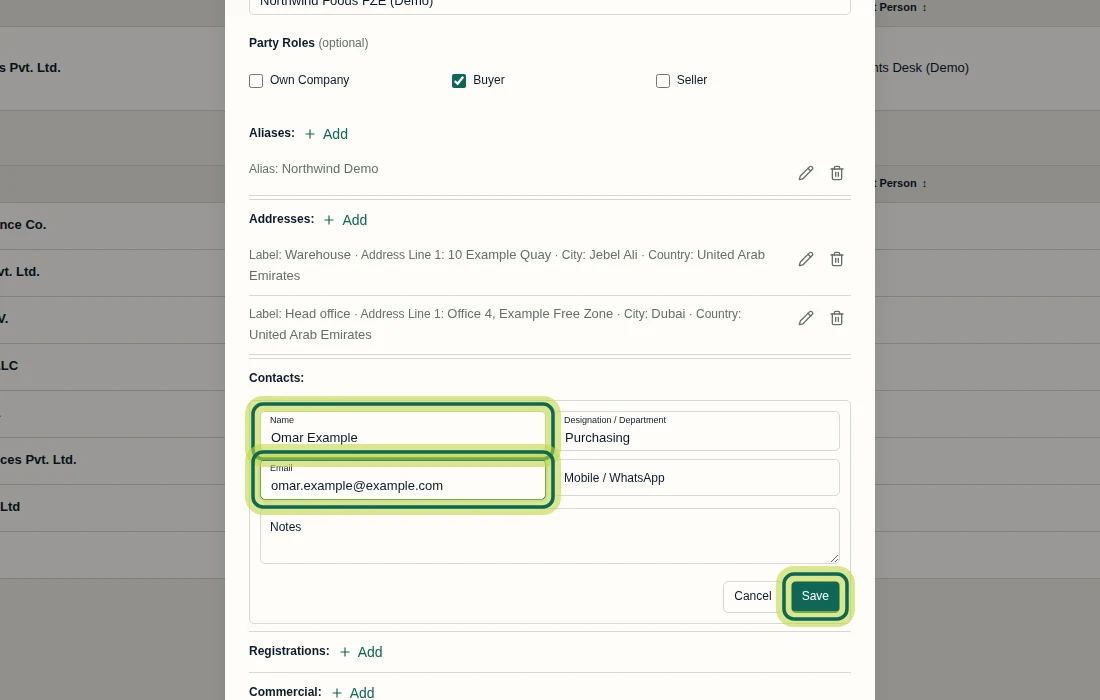
In Contacts, select Add and enter the contact's Name and Email. Add Designation / Department or Mobile / WhatsApp if needed. This example uses Omar Example, Purchasing, and omar.example@example.com. Select the contact entry's Save button, review the listed entries, and then select Save Party at the bottom. Save Party stays unavailable while an entry is open; save or cancel that entry first. Check the saved message and the new row under Other Parties. Adding a contact does not invite them or create user access.
Step 4 Find the saved party by its alias
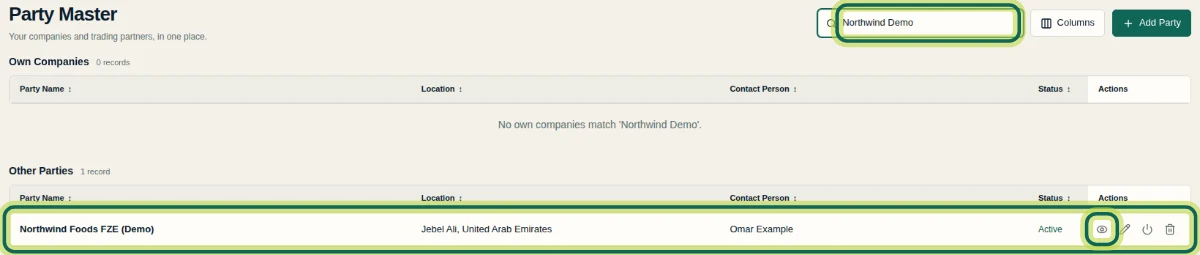
In Party Master, enter the saved alias in Search party…. Searching for Northwind Demo shows Northwind Foods FZE (Demo) under Other Parties. Select the row's eye icon, View Northwind Foods FZE (Demo), to open View Party and check its details. The separate Own Companies list may show no matches for this search.
Step 5 Edit a saved contact email
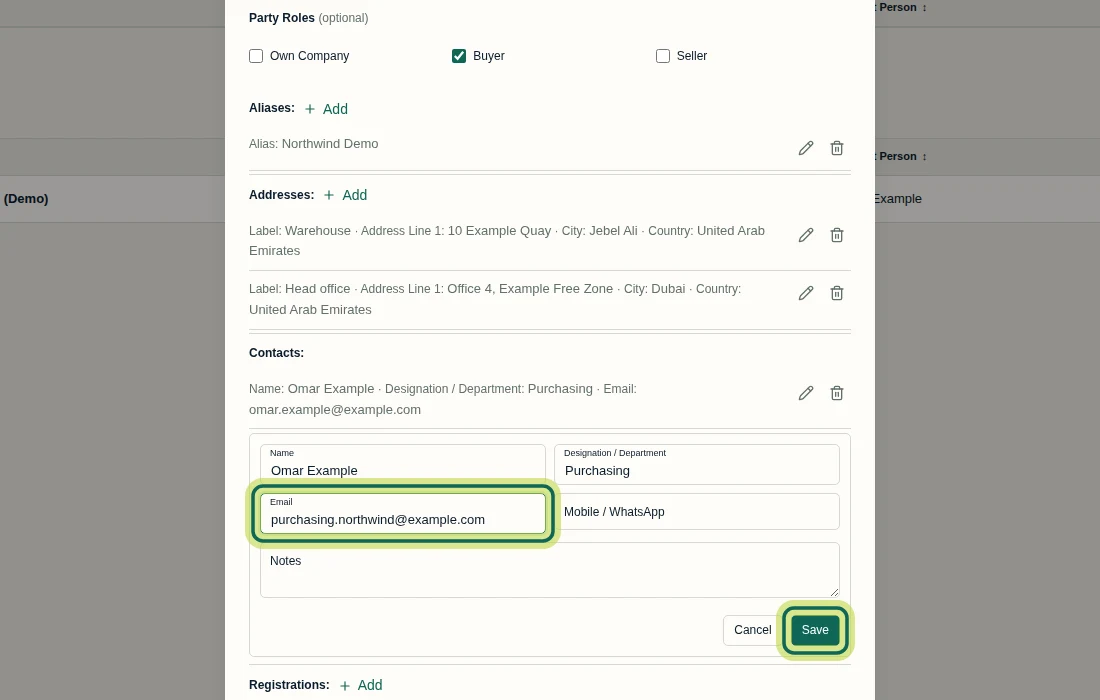
Open the party with its eye icon and select Edit Party. Under Contacts, select the pencil beside the contact you want to update. Change Email; this example replaces Omar's address with purchasing.northwind@example.com. Select the contact entry's Save button, then Save Party once the entry editor closes. Both save actions are needed to keep the change. Editing a party does not rewrite details already saved in Shipment Setup or existing documents.
Step 6 Confirm the update and view revision dates
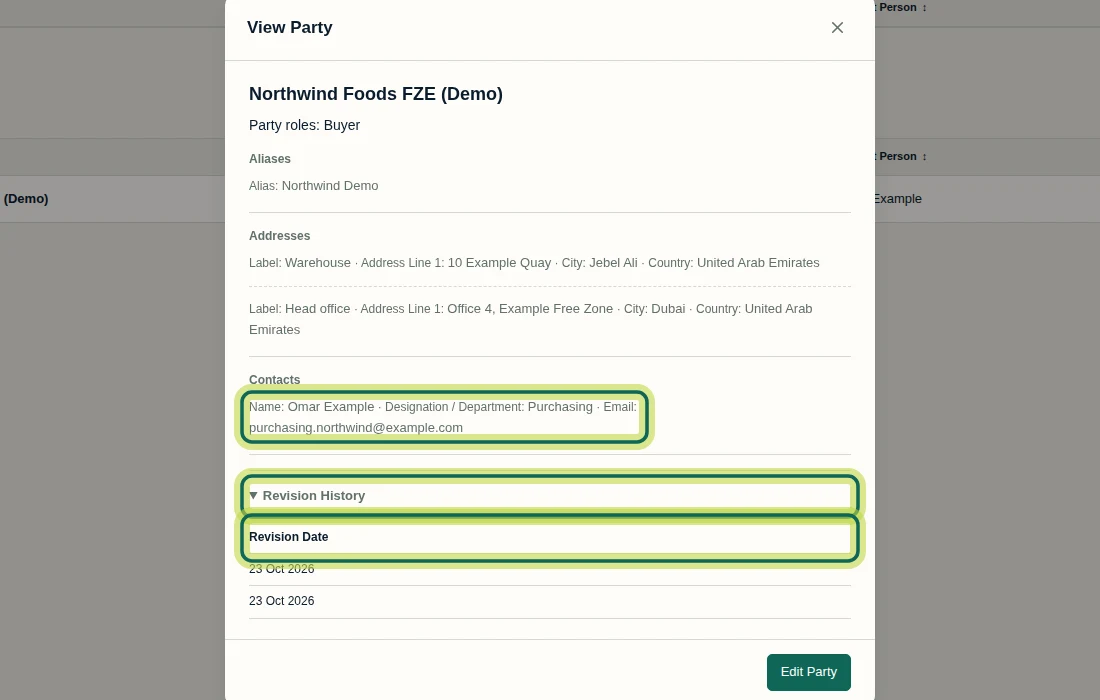
After saving, reopen View Party from the party's eye icon and confirm the updated email under Contacts. Expand Revision History to see the Revision Date entries. This history lists dates; it does not provide a revision comparison or restore control. With the party saved, continue to selecting a party in Shipment Setup.
Step 7
Expected result
A saved party appears in Other Parties, can be found by its alias, and shows the updated contact email and revision dates in View Party.
Next tutorial
Was this helpful?
If something did not work as described, tell us and we will help.