How to Update Shipment Setup
Change a shipment’s shipping line, confirm Saved, and review Setup differences without overwriting an existing Contract.
- ForShipment owners and internal users with permission to edit Shipment Setup
- Task timeAbout 3 min
- Video2:22
- Last checked2026-10-23
Overview
Edit Shipping line / carrier in an existing shipment’s Setup and confirm the saved value. Review an existing Contract separately, including the direction of Update Setup in its Setup differences panel.
What you'll learn
- Open Setup for the correct shipment
- Edit Shipping line / carrier and save the change
- Confirm Saved without assuming comparisons are complete
- Review Setup differences and understand that Update Setup copies document values into Setup
Before you begin
- An existing shipment with saved Setup Enter Shipment Setup
- Permission to edit this shipment’s Setup
- An existing saved Contract to follow the optional Setup differences review Create Your First Contract
Step-by-step guide
Open the shipment’s Setup
Open the shipment you want to change, check its name at the top of Overview, and select Setup in the shipment menu. You need permission to edit this shipment’s Setup; view access alone does not provide Save actions.
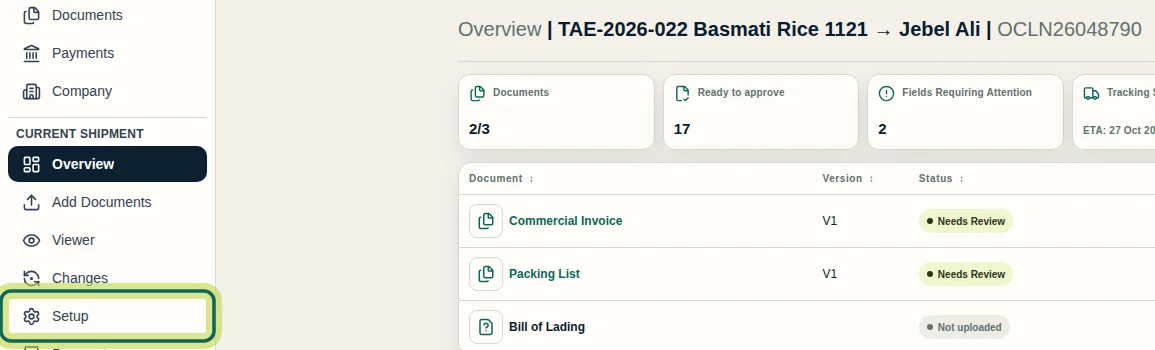
Step 1 Check the current shipping line
In Setup, stay on Shipment and find Shipping line / carrier at the bottom right. Confirm the shipment name in the header and check the current carrier. This example starts with Oceanline Container Lines (Demo).
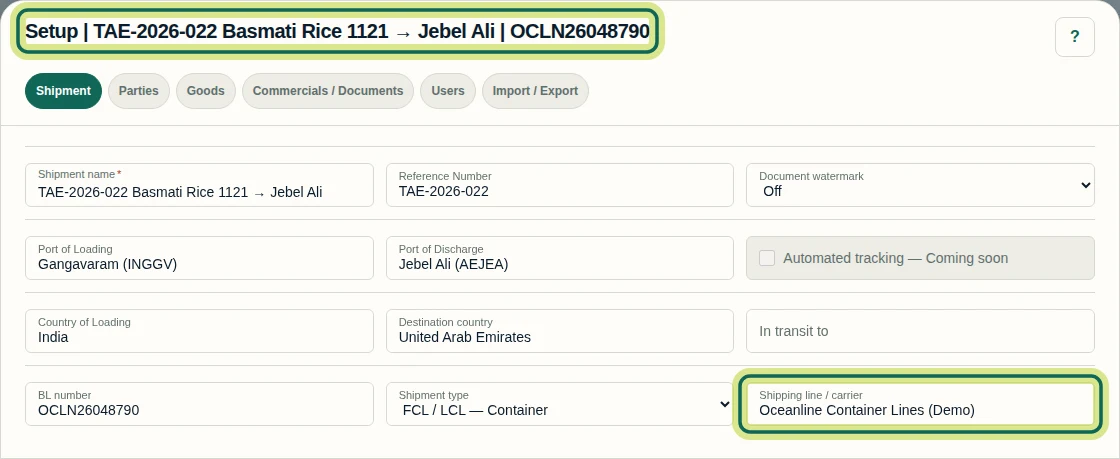
Step 2 Enter the new carrier and save
Replace Shipping line / carrier with the correct name; this example uses Seabridge Lines (Demo). Review the spelling, then select Save to keep Setup open for confirmation. Save & Close saves and closes the editor. The remaining footer action is Cancel & Close.
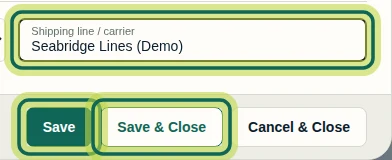
Step 3 Confirm the saved value
Wait for Saved above the fields, then check that Shipping line / carrier shows the new name. Here it shows Seabridge Lines (Demo). Saved confirms the Setup change; it does not mean every shipment comparison has finished updating.
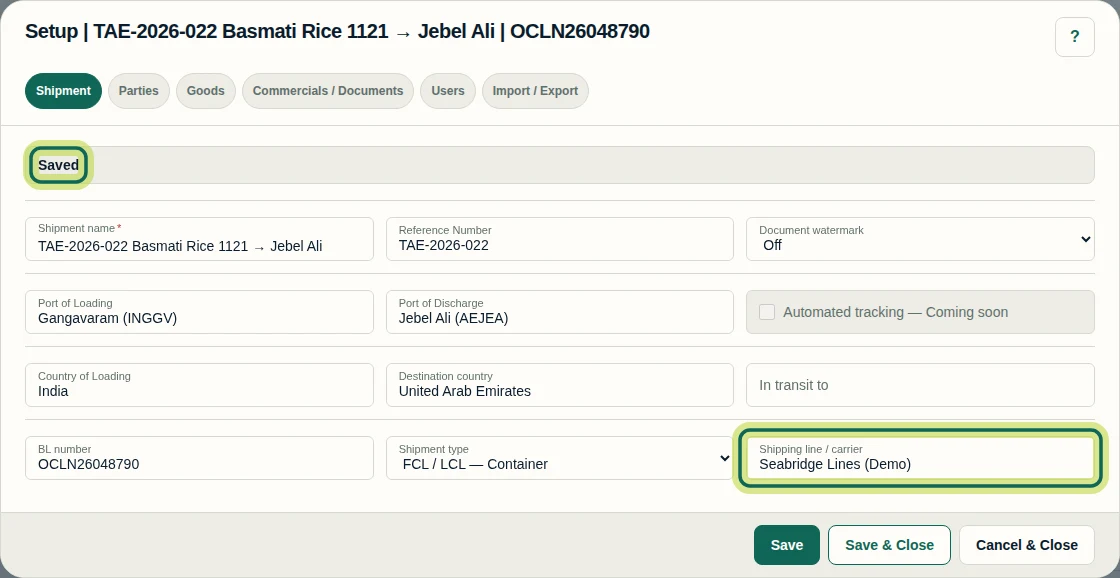
Step 4 Review an existing Contract separately
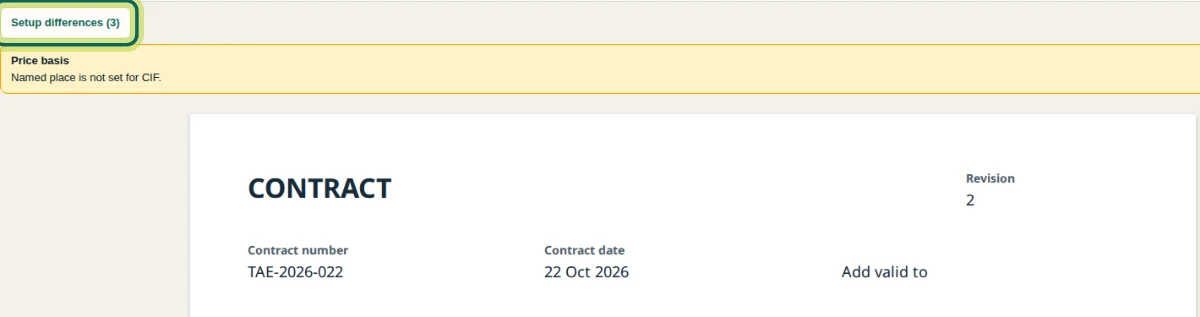
When reviewing an existing Contract, treat document changes as a separate task. Saving Setup does not regenerate an existing document or rewrite its saved values. This Contract shows Revision 2. Select Setup differences (3) to review its saved values against Shipment Setup.
Step 5 Check the direction before using Update Setup
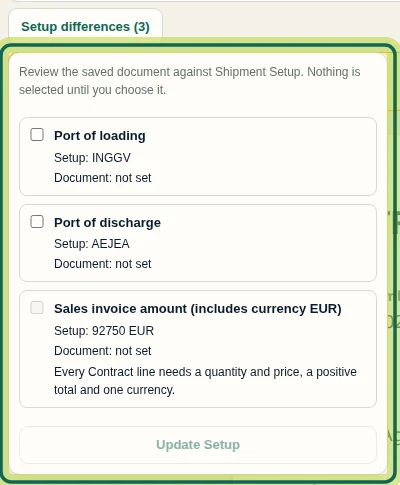
In Setup differences (3), review each Setup and Document value. Nothing is selected until you choose it. Select an available difference and use Update Setup only if you intend the saved document value to replace the corresponding Shipment Setup value. This action does not update the Contract. Here, both port values are not set in the document. Sales invoice amount (includes currency EUR) is unavailable: every Contract line needs a quantity and price, a positive total, and one currency. The shipping line is not printed on this Contract and is not one of these three differences. To change the Contract, continue with the separate commercial document editing task.
Step 6
Expected result
Shipping line / carrier shows the new value with a Saved confirmation. You understand that existing documents require separate updates and that Update Setup copies selected document values into Setup.
Next tutorial
Was this helpful?
If something did not work as described, tell us and we will help.