Upload Shipping Documents
Add your existing shipping documents to a shipment and choose each document's type.
- ForShipment users allowed to upload documents
- Task timeAbout 4 min
- Video0:56
- Last checked2026-10-22
Overview
Uploading is free. Eligible documents are then read by AI to extract their values, which uses credits per page.
What you'll learn
- Open Add Documents
- Choose files or a folder
- Assign each document type
- Upload and follow processing
Before you begin
- Expected document types saved in Setup Enter Shipment Setup
Step-by-step guide
Open Add Documents
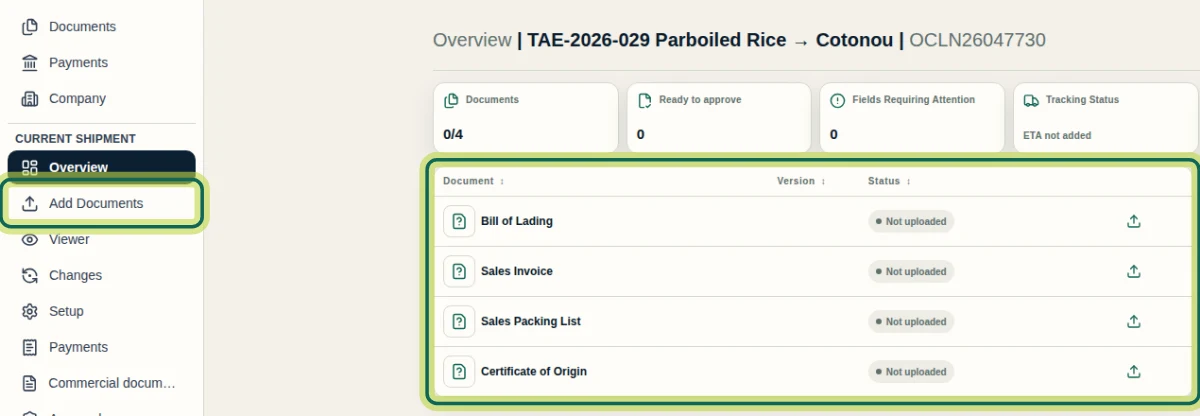
The shipment's Overview lists the documents you expect. Select Add Documents in the shipment menu.
Step 1 Choose your files
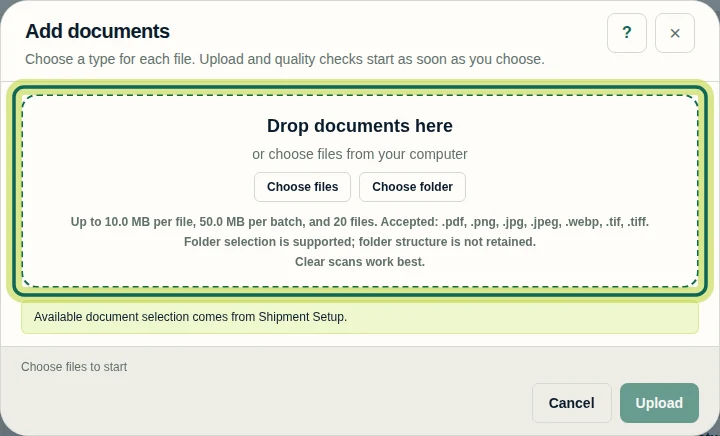
Drop your files on the dialog, or select Choose files or Choose folder. Accepted: PDF, PNG, JPG, JPEG, WEBP, TIF and TIFF, up to 10 MB per file and 20 files at a time. Clear scans work best.
Step 2 Choose a type for each file
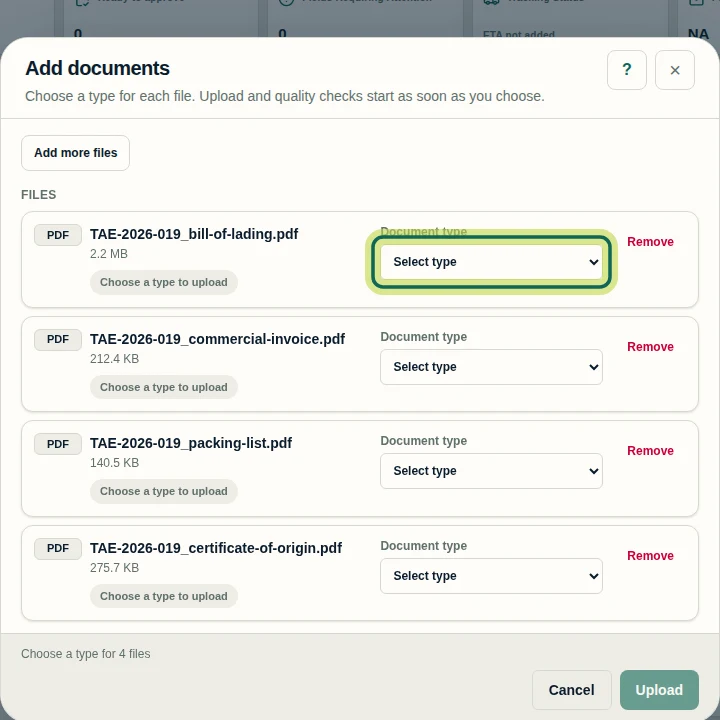
Choose a Document type for each file. The types come from Shipment Setup. Each file's upload and quality checks start as soon as you choose.
Step 3 Check quality and upload
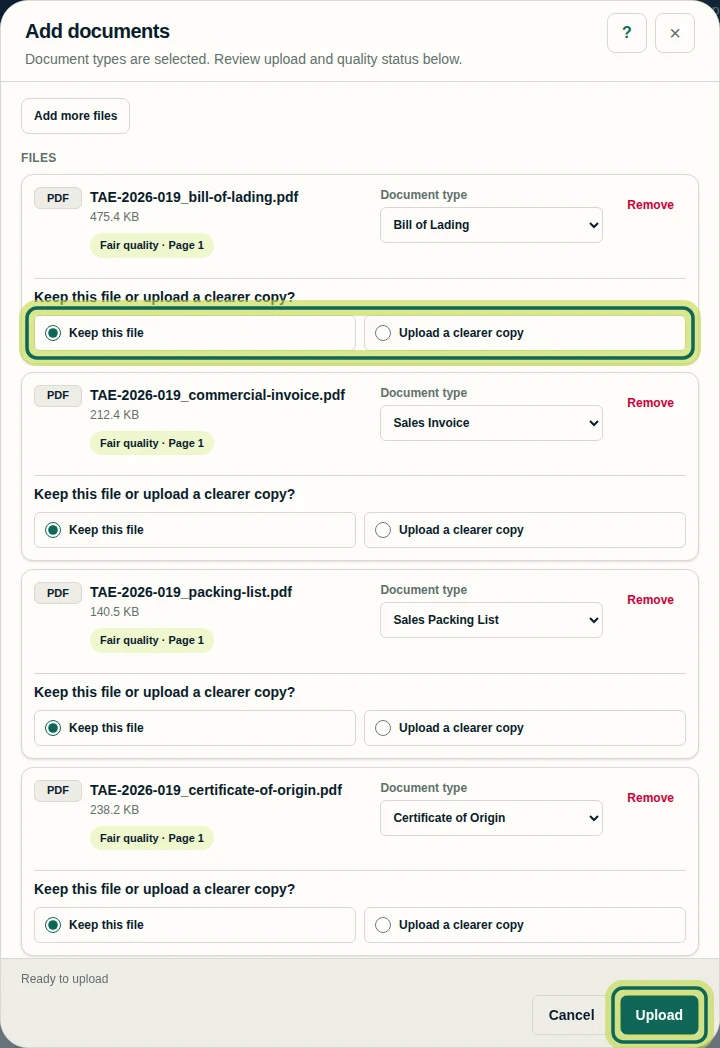
Shiplete rates each scan's quality. For a fair-quality scan, choose Keep this file or Upload a clearer copy. When every file has a type, select Upload.
Step 4 Watch the documents being read
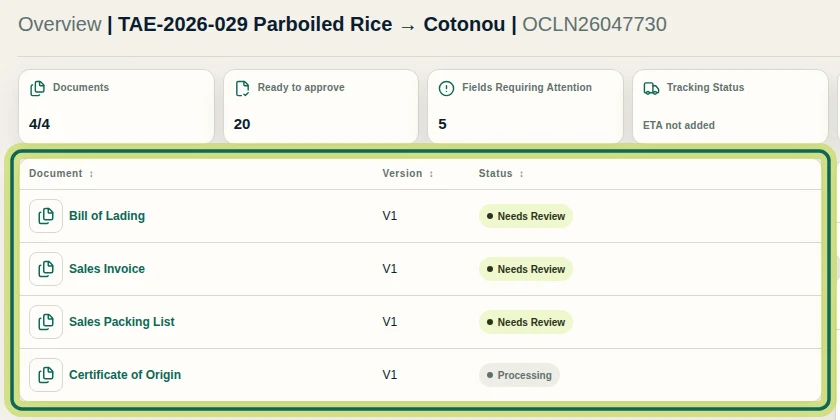
On the Overview, each document gets a version and moves from Processing to Needs Review as Shiplete reads its fields. Next, open a document in the Viewer to check what was read.
Step 5
Expected result
The documents appear on Overview. Values appear once reading has finished.
Next tutorial
Was this helpful?
If something did not work as described, tell us and we will help.